

For Google Search Console to display data about your website, you must first prove to Google that the site actually belongs to you. This process is called ownership verification (Verification), and it is a one-time setup - provided the verification method is not removed from the site.
Step 1: Logging into Search Console and Adding a Property
Go to search.google.com/search-console and log in with your Google account.
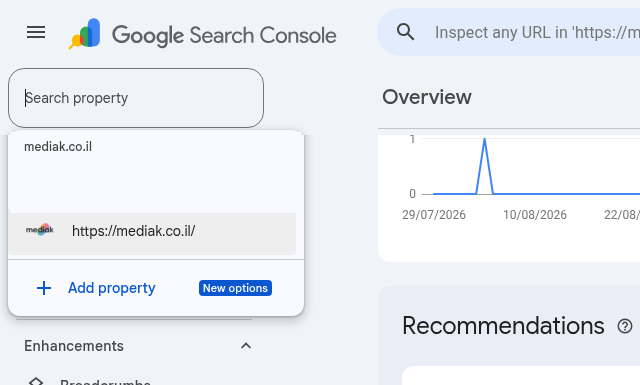
Open the property selector (Property selector) at the top of the page, next to the current property name.
Click Add property. On the next screen, select Add a website - the new options for connecting social profiles (Instagram, TikTok, X, YouTube) are not relevant for website verification.
Property selector in Search Console - website property selected (actual screenshot, cropped; irrelevant details removed).
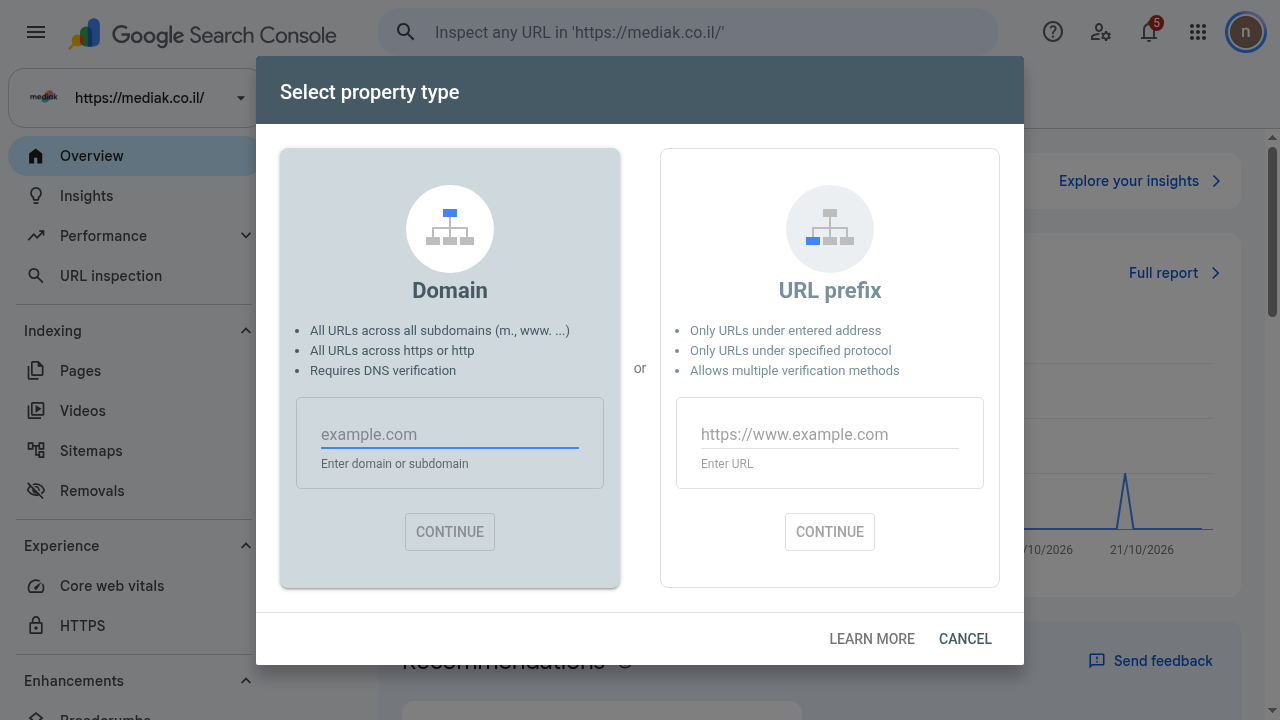
Step 2: Choosing the Property Type - Domain or URL prefix
Domain covers all addresses of the domain: all subdomains (www, m, etc.) as well as http and https combined, and requires verification through the domain registrar (DNS).
URL prefix covers only addresses starting with the exact URL you entered, including the protocol, and allows several simpler verification methods.
If you have access to DNS settings - a Domain property provides the full picture. If not, URL prefix will do the job for most needs.
Step 3: Choosing a Verification Method
On the verification page, the available and recommended methods for your site will be displayed:
Domain registrar verification (DNS): Log into your account at the registrar and add a TXT record provided by Google. This is the only way to verify a Domain property.
HTML file upload: Download a personal verification file and upload it to the root directory of the site, without altering its name or content, and ensuring no login requirement (verify in an incognito window).
HTML tag: Paste a personal meta tag inside the <head> of the homepage, within the first 2MB of the file.
Google Analytics: Possible if a GA4 tracking code from an account you have access to is already installed on the site.
Google Tag Manager: If the container GTM snippet is already installed on the site and you have Publish permissions for it - usually the simplest method.
If the website is built on a platform (WordPress, Wix, Shopify), it is recommended to first check its documentation for dedicated instructions - some platforms have a built-in setting or plugin. For WordPress, Google's Site Kit plugin handles verification as well.
Step 4: Completing Verification
After adding the verification method to the site, return to the verification page and click Verify.
If verification fails, make sure the file or tag is accessible at the correct URL, without redirects to another domain and without requiring a login.
Keep the verification method on the site even after success - removing it will revoke verification, and Google periodically checks that it is still present.
Tips
You can add more than one verification method (Settings → Ownership verification) as a backup. If you are unable to verify, ask an existing owner to add you via Search Console. Data collection begins only from the point of verification - so it is advisable to verify early.